Ten wpis jest również dostępny w języku:
![]() Polski
Polski
Hello!
If you’re planning to enter the United Arab Emirates with your own vehicle—whether a car or a motorcycle—you’ll sooner or later run into the topic of insurance. It’s one of those documents that’s simply better to sort out in advance, rather than wasting time and nerves at the border.
In this article, we show you how to buy vehicle insurance using the UAE Aber app.
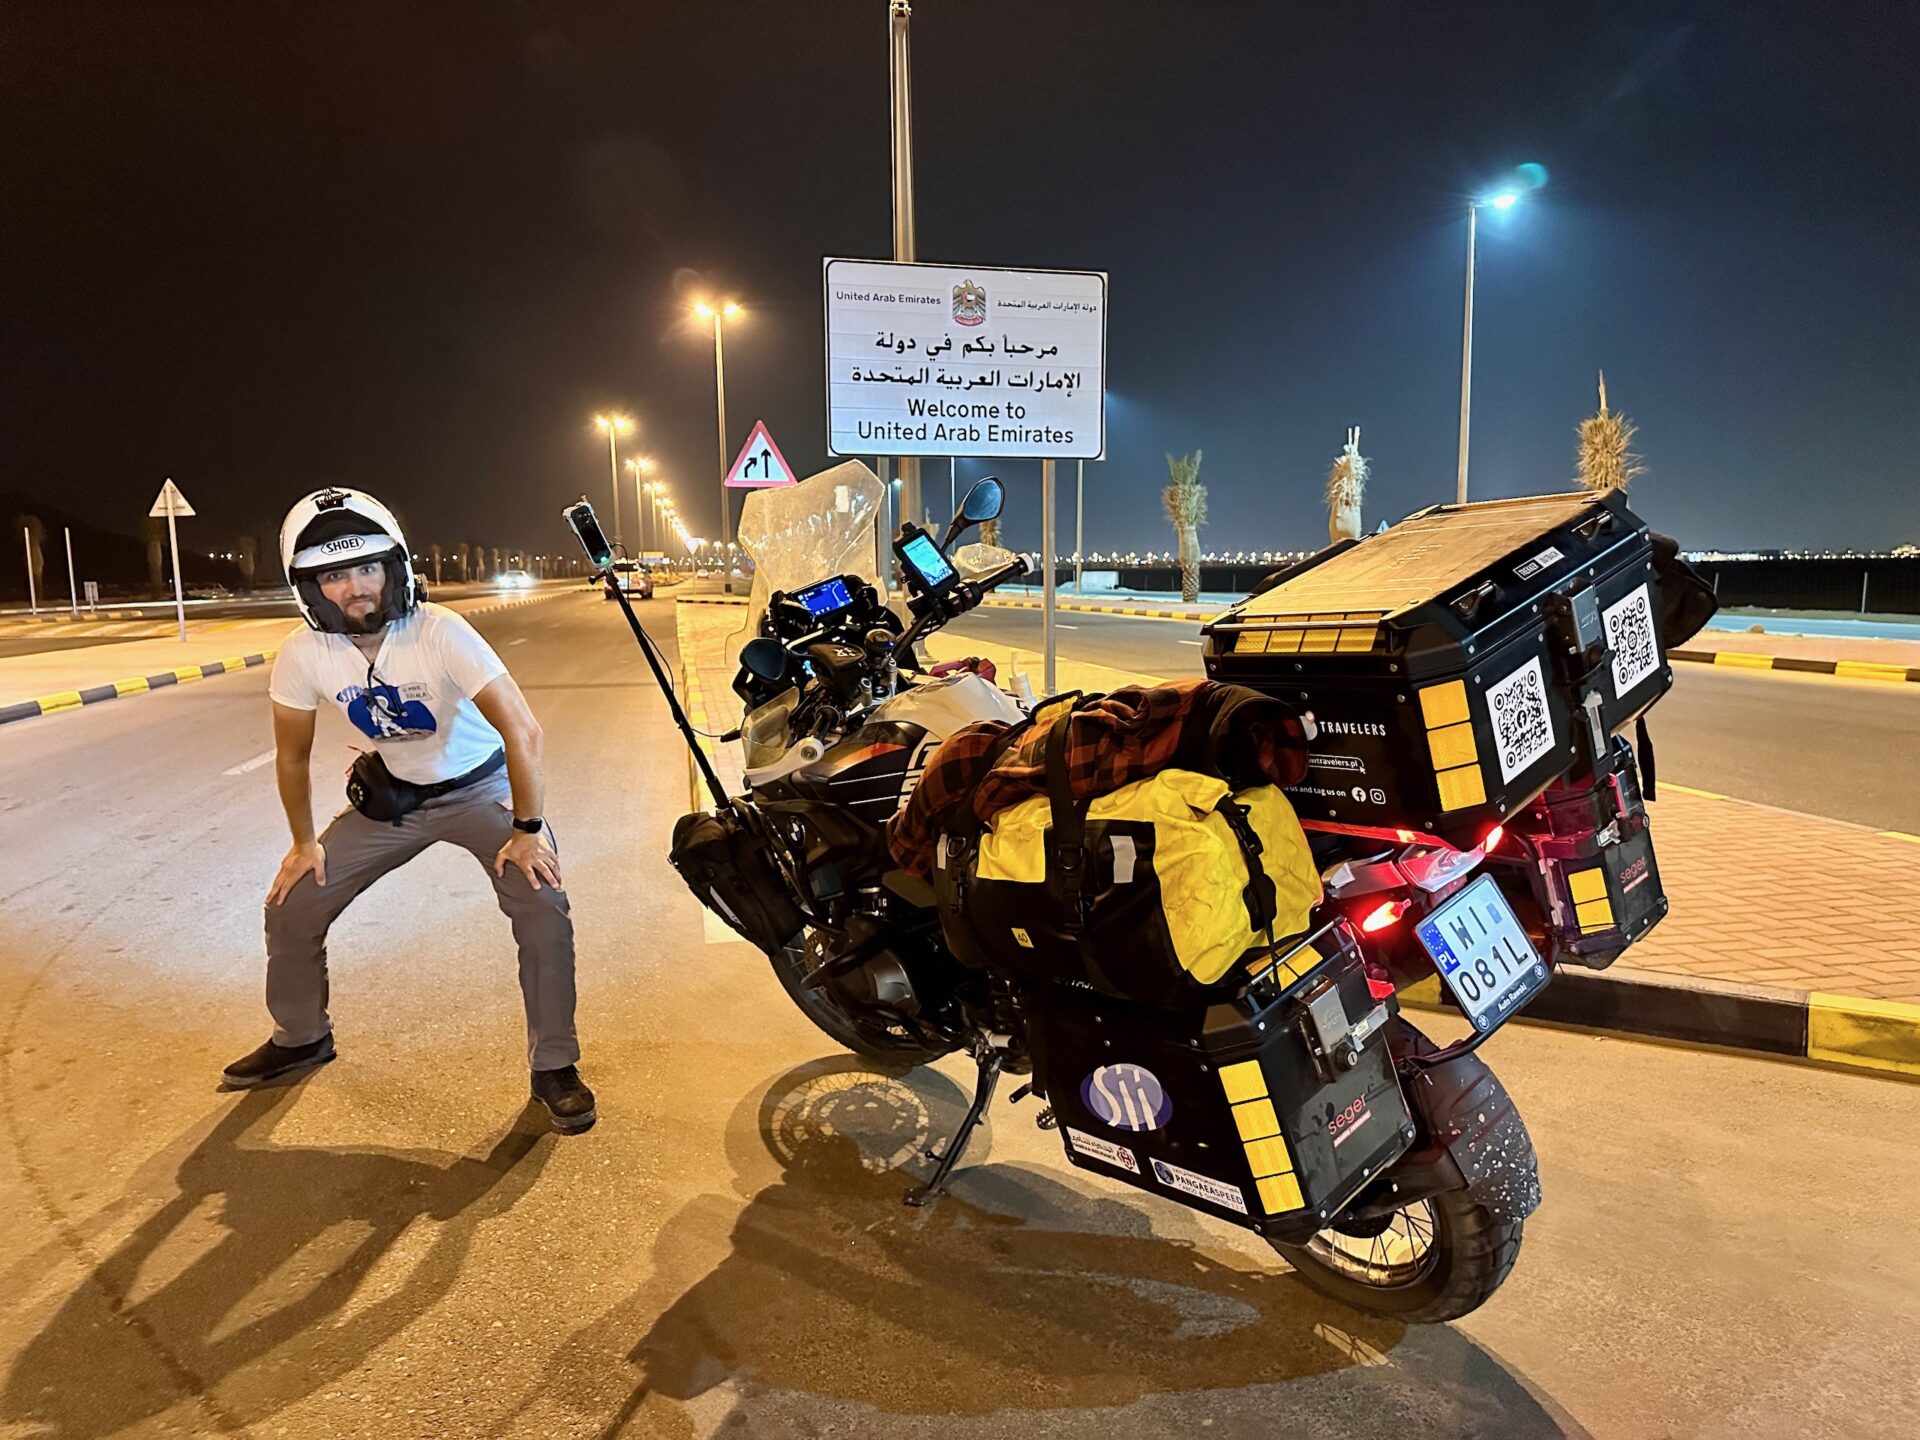
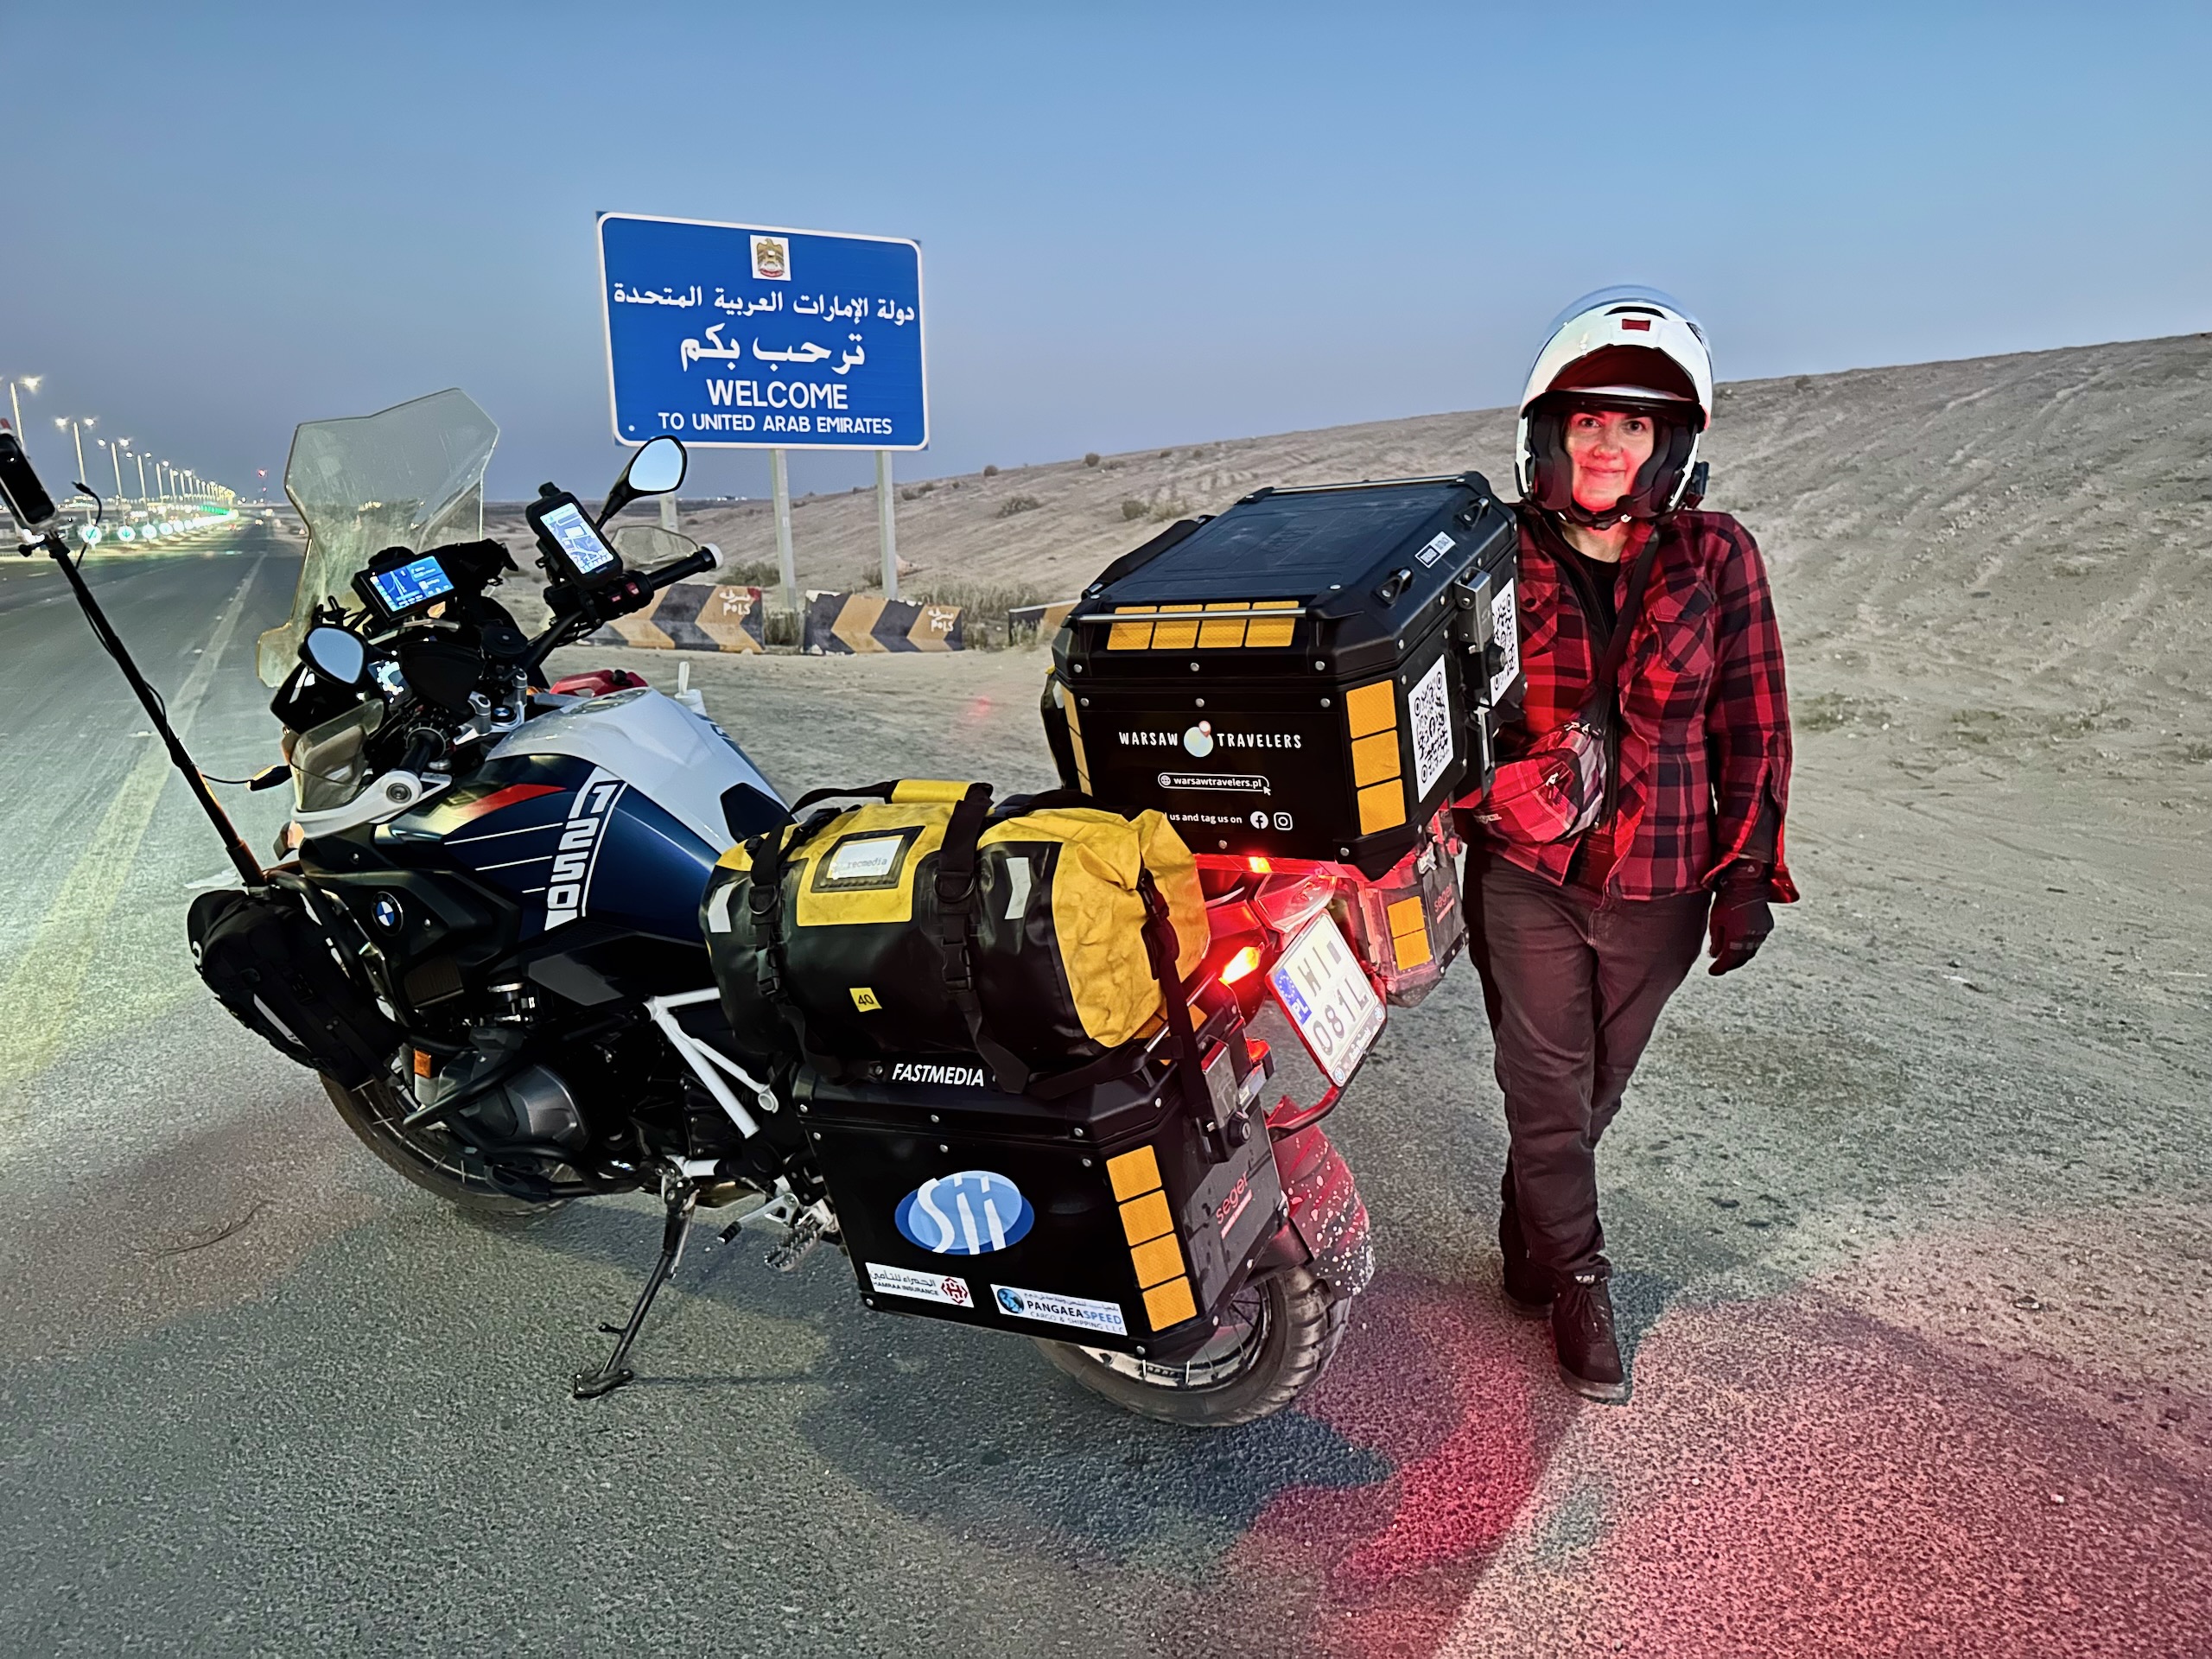
We completed this journey as part of the 🏍️ Desert Horizons project – a ride from 🇵🇱 Poland all the way to 🇴🇲 Oman on our own motorcycle, along with the full “overland” package of paperwork along the way. The UAE was an important stop for us, as it’s where we planned to ship the motorcycle back to Europe.
We’ve been to the UAE several times already, so along the way we’ve gathered plenty of practical, real-world insights. And since we’ve just come back from another trip, we’ve put everything together in one place and are sharing another set of useful, step-by-step tips.
Is vehicle insurance mandatory in the UAE?
Yes – and in a very practical sense. Without a valid policy, you can be turned away at the border, and you’re simply not allowed to drive around the UAE without third-party liability insurance.
First: entering the UAE by land. For cars and motorcycles on foreign license plates, insurance is required at selected border crossings. The ICP (Federal Authority for Identity, Citizenship, Customs and Port Security)
Second: driving within the UAE itself. The absolute minimum required is third-party liability insurance, equivalent to standard civil liability cover. In the UAE, motor insurance policies are standardized, including the “Against Third Party Liability” policy, introduced under unified motor insurance regulations (Insurance Authority Resolution No. 25 of 2016, now overseen by the Central Bank of the UAE).
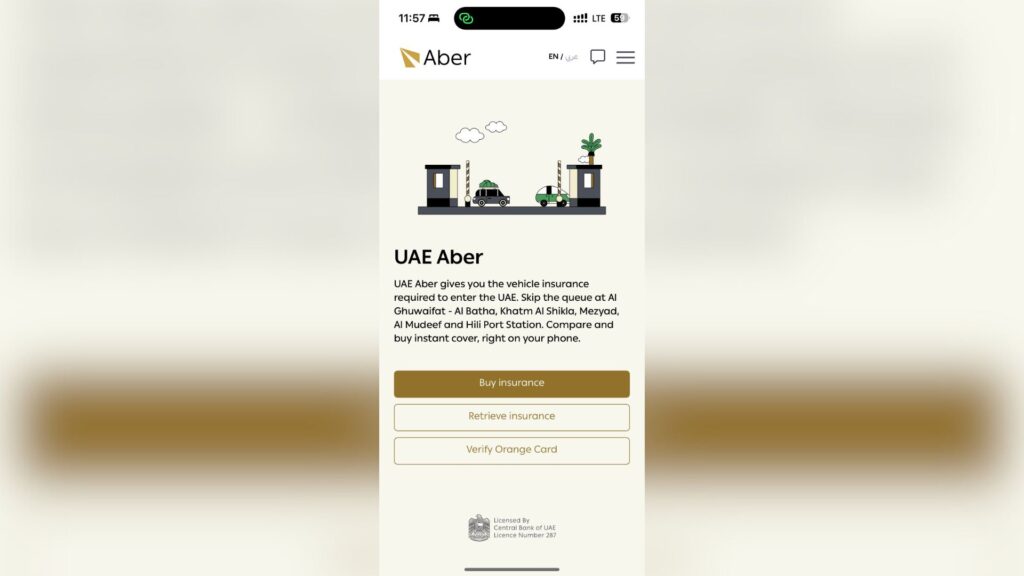
UAE Aber – the official vehicle insurance app
Previously known as Shory Aber and now operating as UAE Aber, this is the official channel for purchasing mandatory entry insurance for foreign vehicles entering the UAE by land. The service was promoted by the government as a “smart insurance service”, allowing travelers to buy a policy online before reaching the border and avoid waiting in line at insurance booths.
In practice, you have two options:
- 🛃 traditionally on site (at the border, at the insurance window/booth, if available),
- 📱 or earlier in the app, and at the crossing you show the ready policy/QR code on your phone
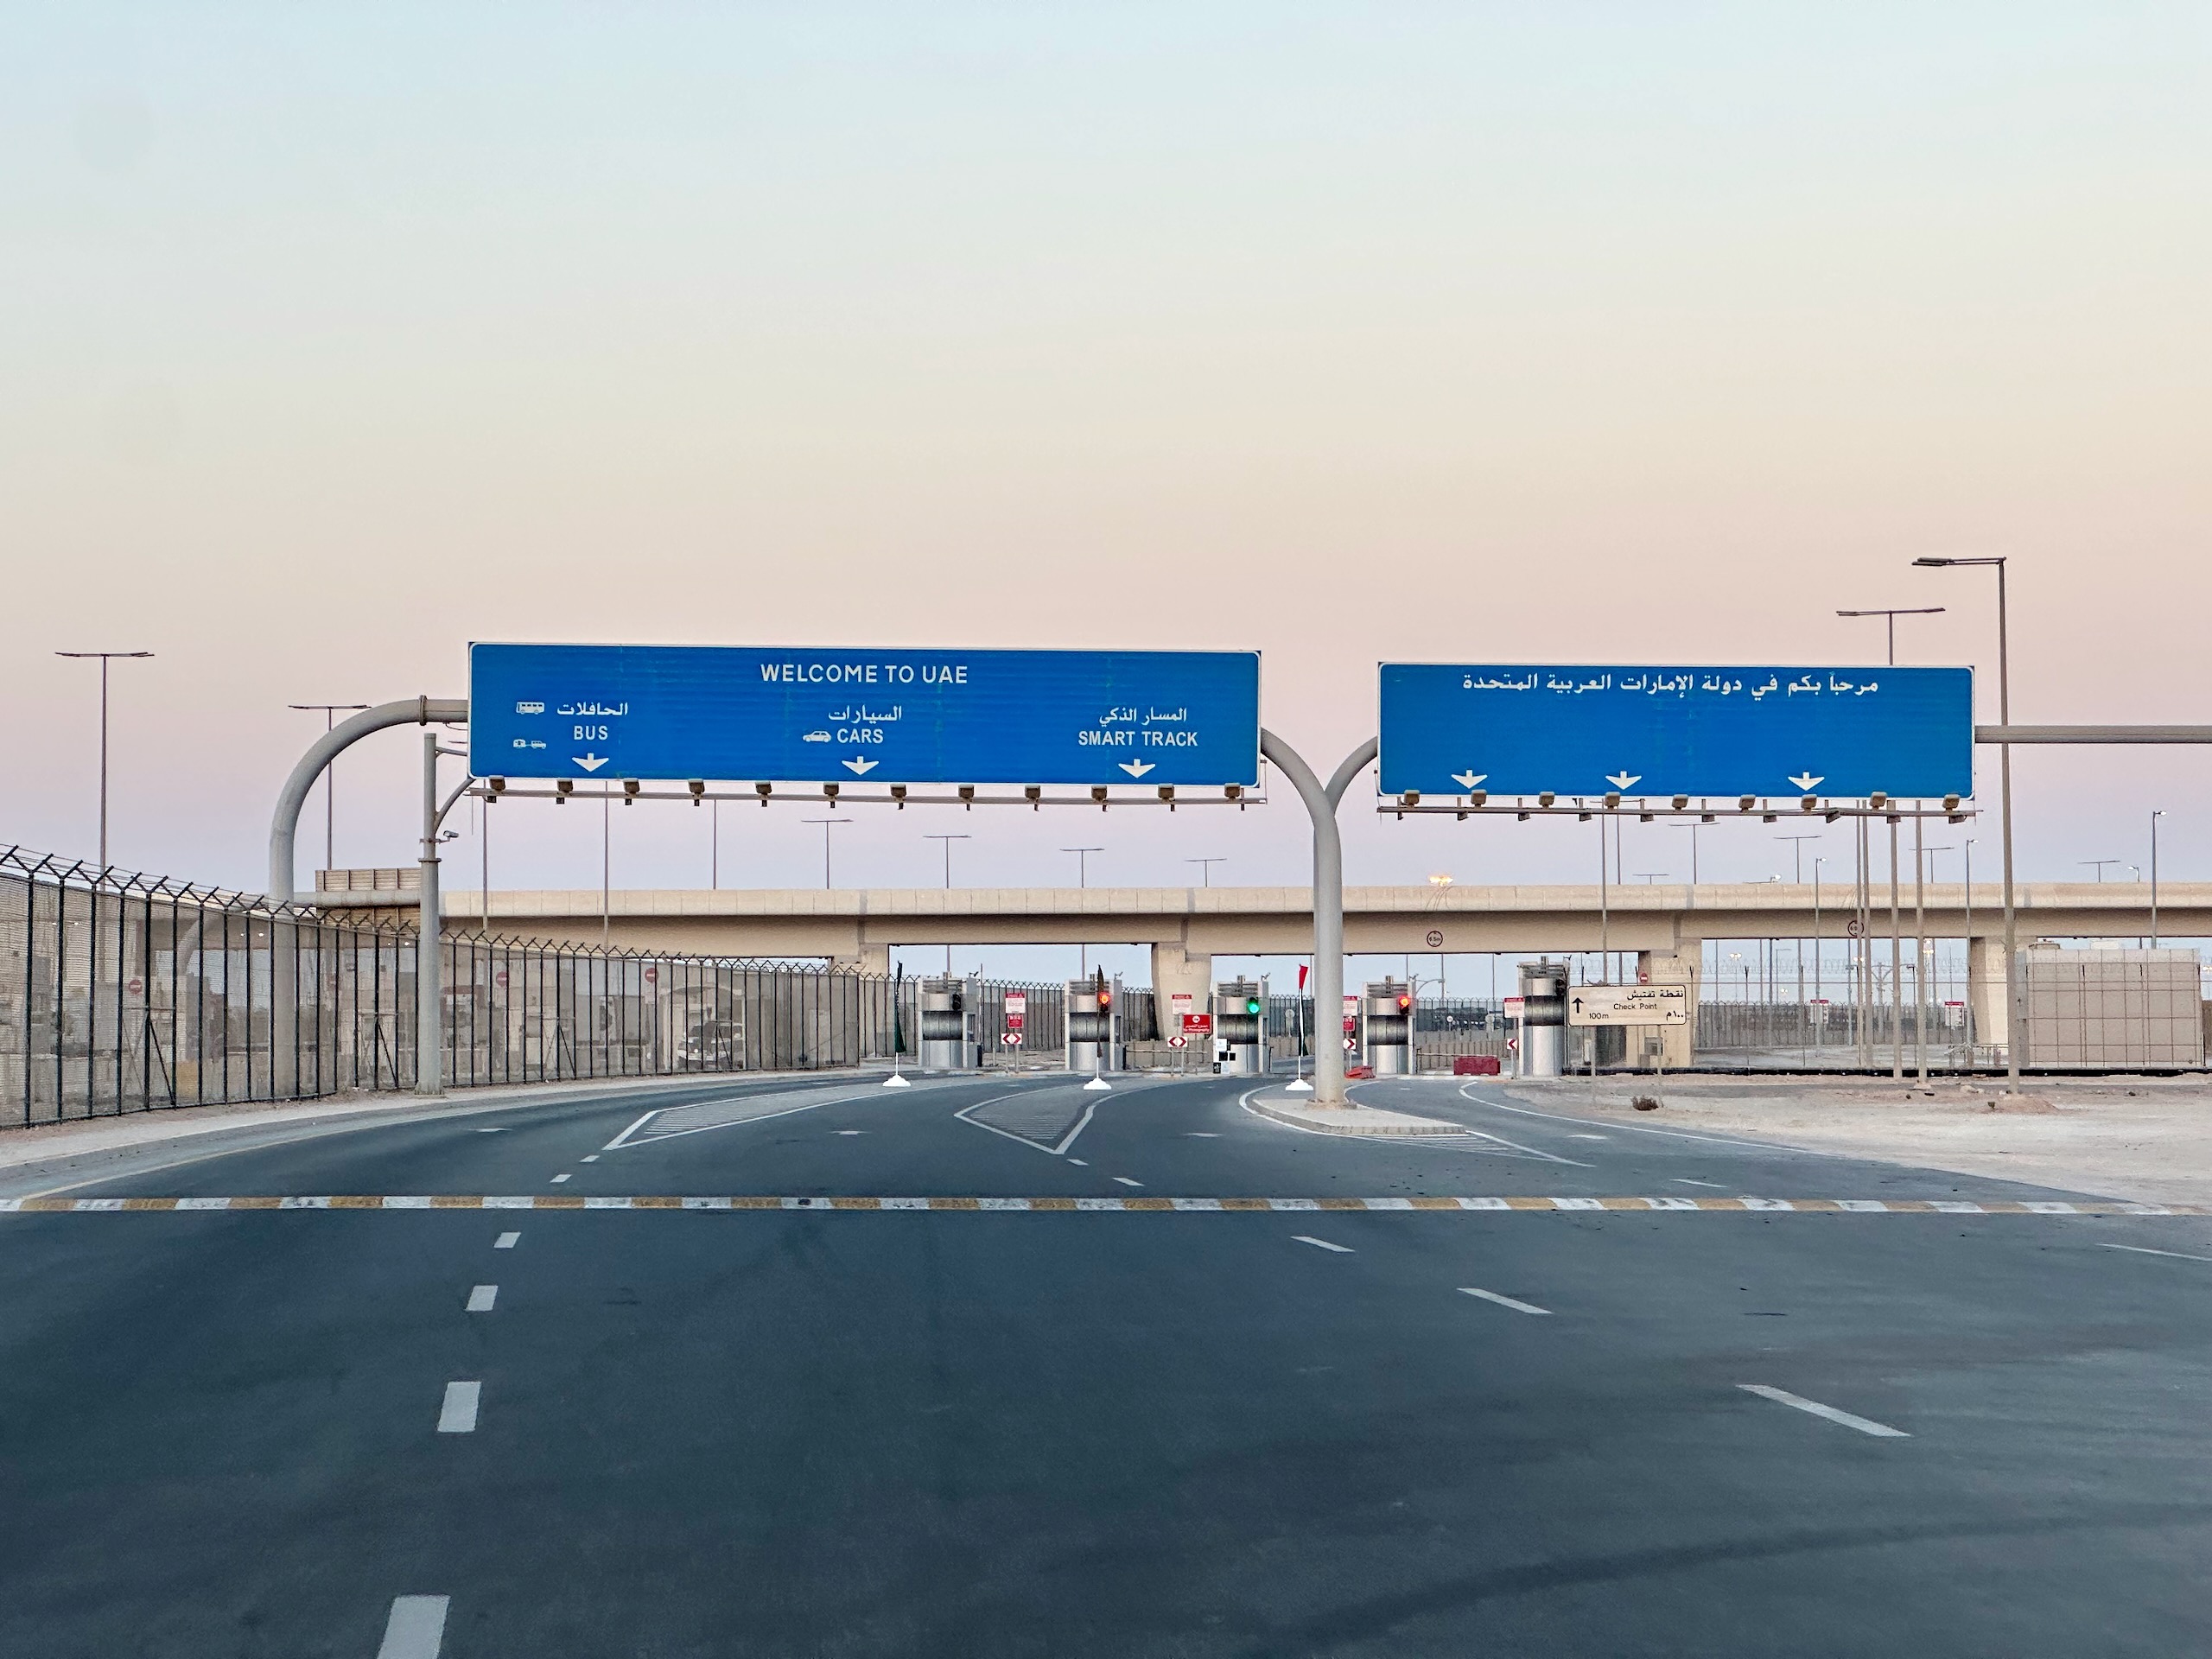
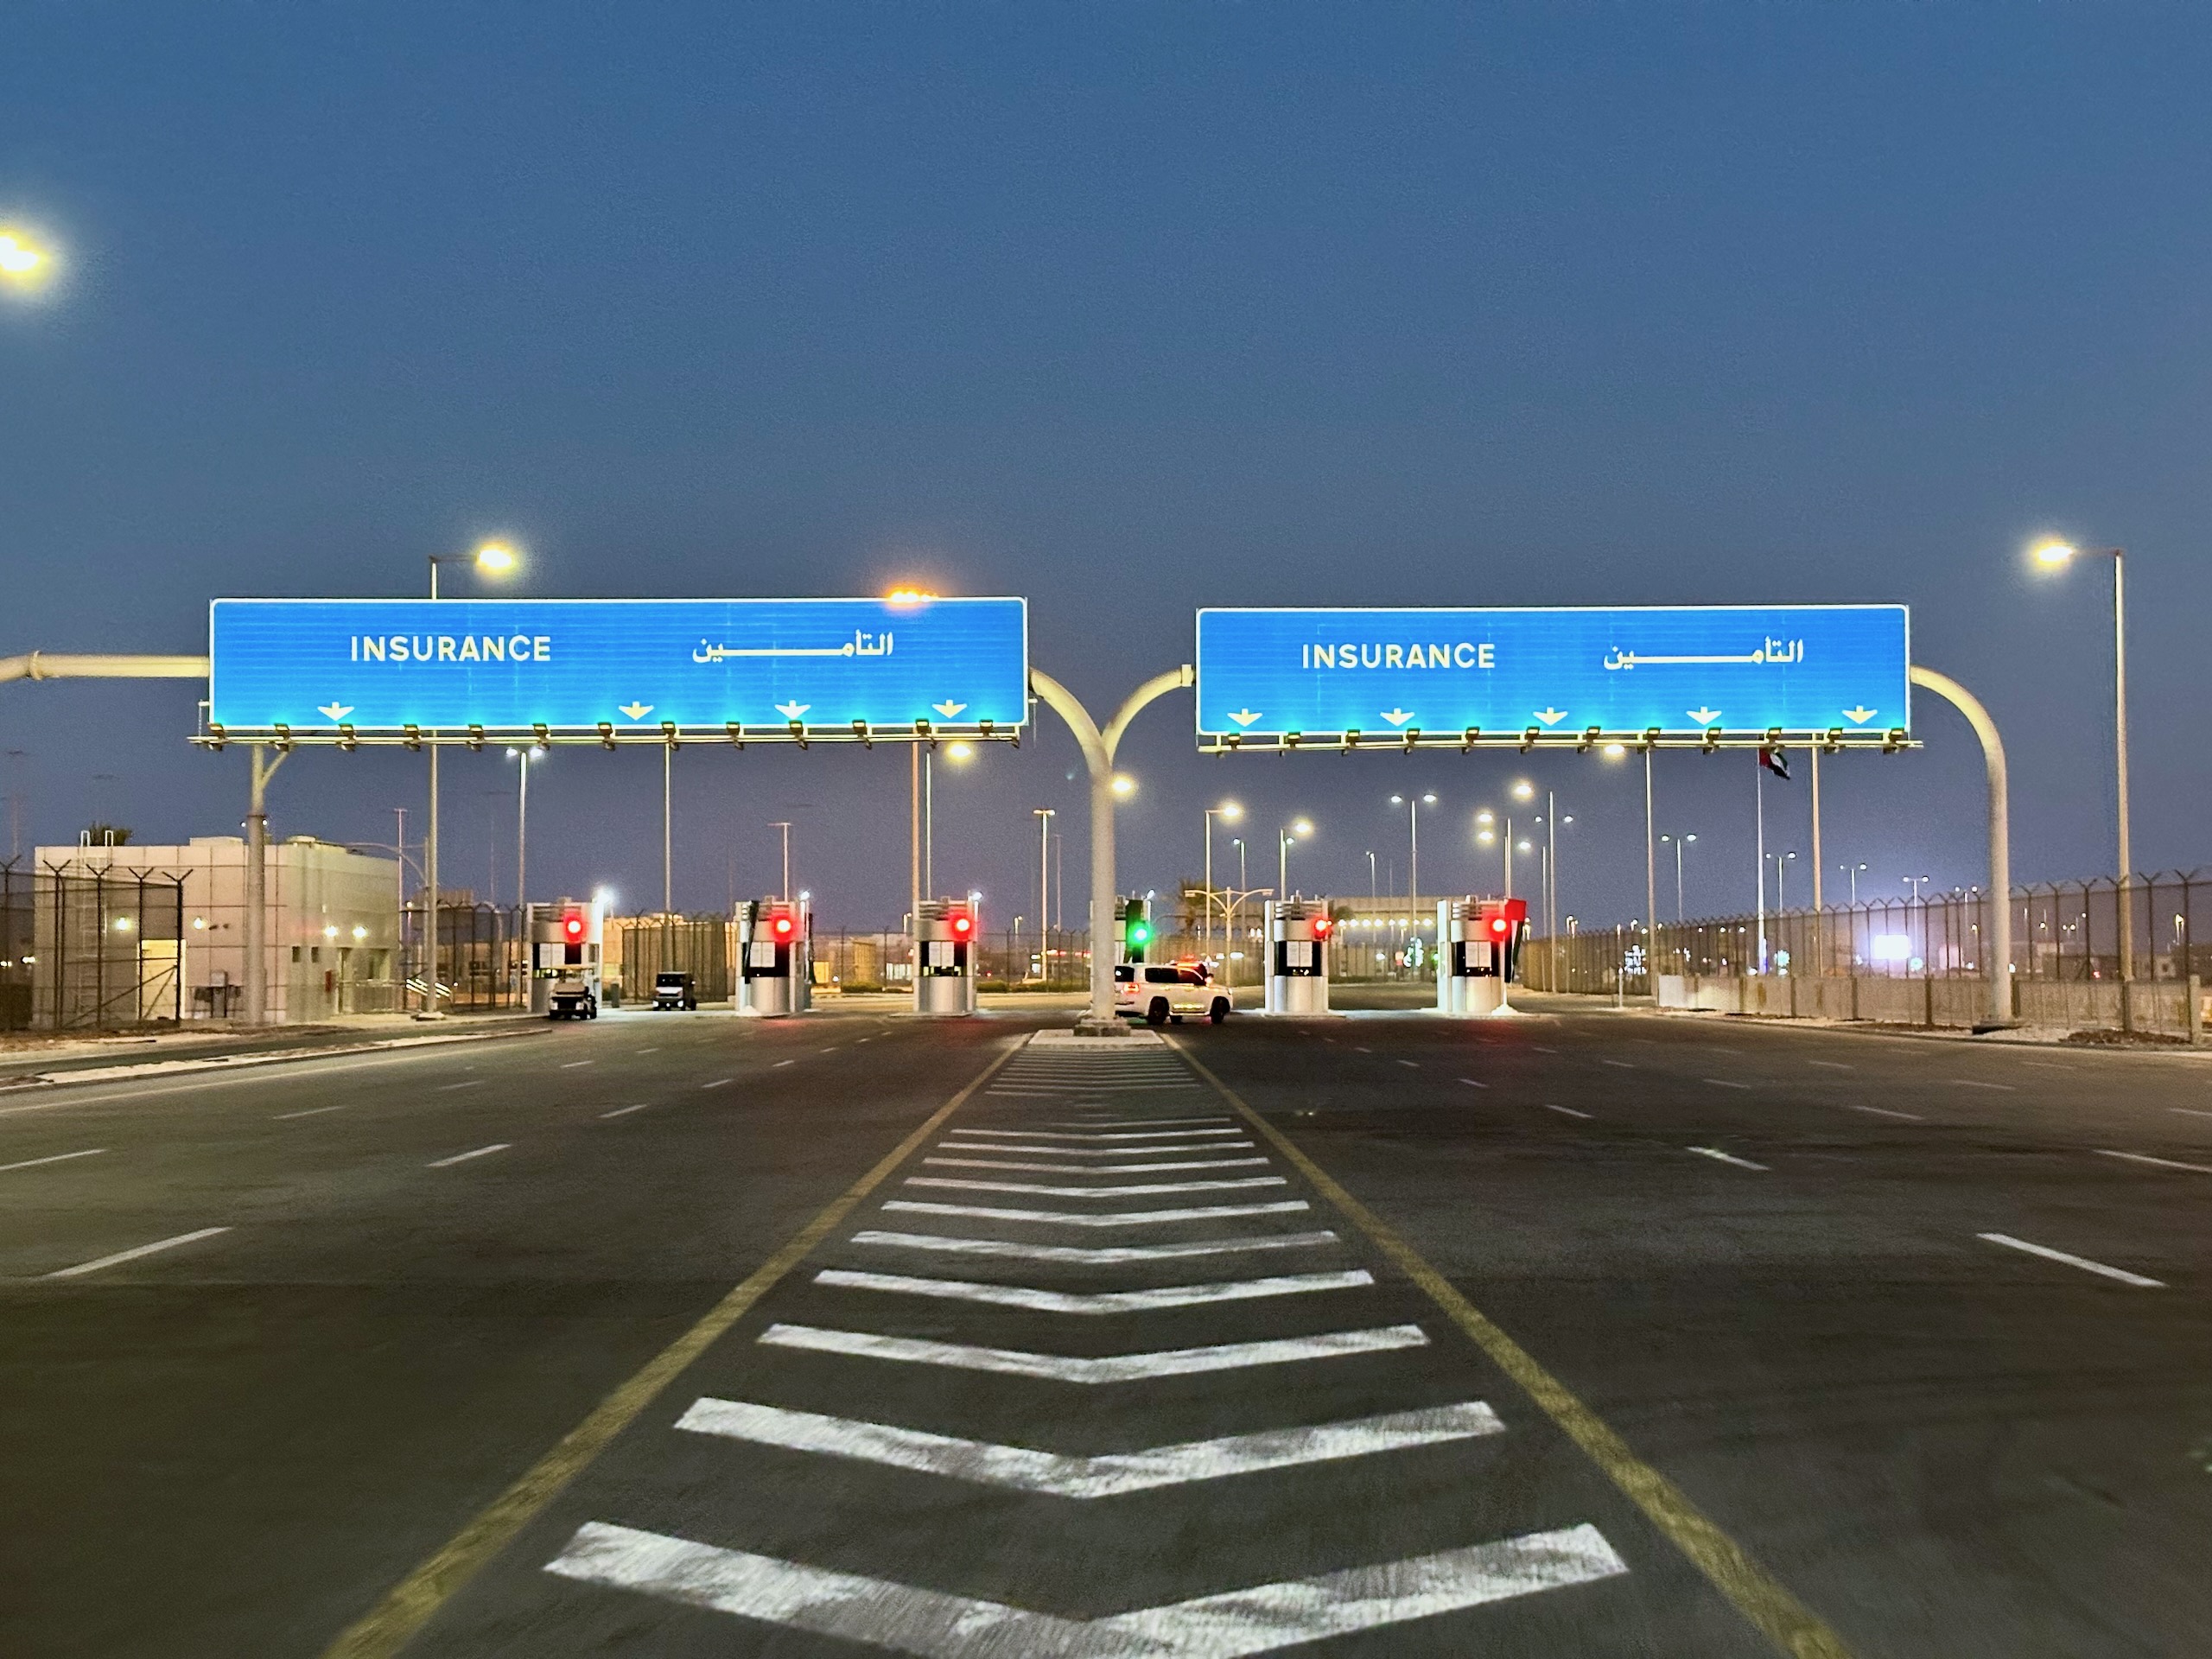
Most importantly, the app works only at selected border crossings. That’s why, when choosing your vehicle type, you’ll see a list of supported entry points. Below is a short “what’s where” overview to make it easier to place everything on the map.
Border crossings supported in the application:
- Al Ghuwaifat – Al Batha (🇦🇪 UAE ↔ 🇸🇦 Saudi Arabia): This is the main border crossing on the western side of the Emirate of Abu Dhabi (Al Dhafrah region), near Al Silaa. It’s typically reached via a long drive along the E11 highway, the main route connecting Abu Dhabi and Dubai with the western border.
- Hili (near 🇦🇪 Al Ain ↔ Al Buraimi, 🇴🇲 Oman): Hili is located in the Al Ain area, with Al Buraimi on the Omani side of the border. It’s a popular crossing for local traffic between Al Ain and northern Oman. Entry here is generally restricted to holders of GCC-issued passports.
- Khatm Al Shikla (🇦🇪 Al Ain ↔ 🇴🇲 Oman): Another Al Ain–area border crossing. It’s often used if you’re heading toward Al Buraimi/Sohar, or continuing farther in the direction of Muscat. One easy landmark nearby is Al Ain Raceway, which makes it simple to spot on the map. This crossing generally accepts all passport nationalities.
- Al Mudeef (south of 🇦🇪 Al Ain ↔ 🇴🇲 Oman): From the UAE side, this border crossing lies south of Al Ain. Similar to Hili, entry here is generally restricted to holders of passports issued by GCC countries.
- Mezyad (southeast of 🇦🇪 Al Ain ↔ 🇴🇲 Oman): This border crossing is located southeast of Al Ain. It’s often a good option if you’re heading deeper into Oman, for example toward Nizwa or Jebel Akhdar, rather than just making a short hop to Al Buraimi.
In our case, when we were driving from Oman to Dubai via the Al Hafyah crossing near Kalba, the border officers seemed genuinely surprised by the app, almost as if they were seeing it for the first time. Technically, this route “shouldn’t” have worked with the app, and yet we were still allowed to enter.
But keep in mind—this is not advice to “do the same” or play dumb. Rules can change, and a lot depends on the day, the officers on duty, and how their systems handle vehicles registered outside the region. In our case it even turned a bit surreal: our motorcycle didn’t have a full license plate number in the system, just “81”. So yeah… welcome to the wild west of paperwork.
How to purchase insurance in the UAE Aber app
You can get it done in just a few minutes, and you don’t need to be a pro at setting up accounts in government apps to make it through the process. The app guides you through everything in a straightforward, step-by-step way.
Alright, let’s go step by step.
Download the application and start the process
You can sort out your UAE Aber insurance on your phone in just a few minutes—without standing in line at the border. First, simply install the app and start the policy purchase process.
UAE Aber is available on both iOS and Android. The easiest way to find it is by typing “UAE Aber” into the app store search.
👉 Link to the App Store: click here
👉 Link to Google Play: click here
After launching the app, you’ll see three buttons on the main screen. The one you’re interested in is “Buy Insurance”.
Quick note on the Orange Card: it’s a “regional international” third-party liability (TPL) insurance certificate used between Arab countries. It confirms liability coverage for damage caused to third parties abroad and is typically used for cross-border travel within the region.
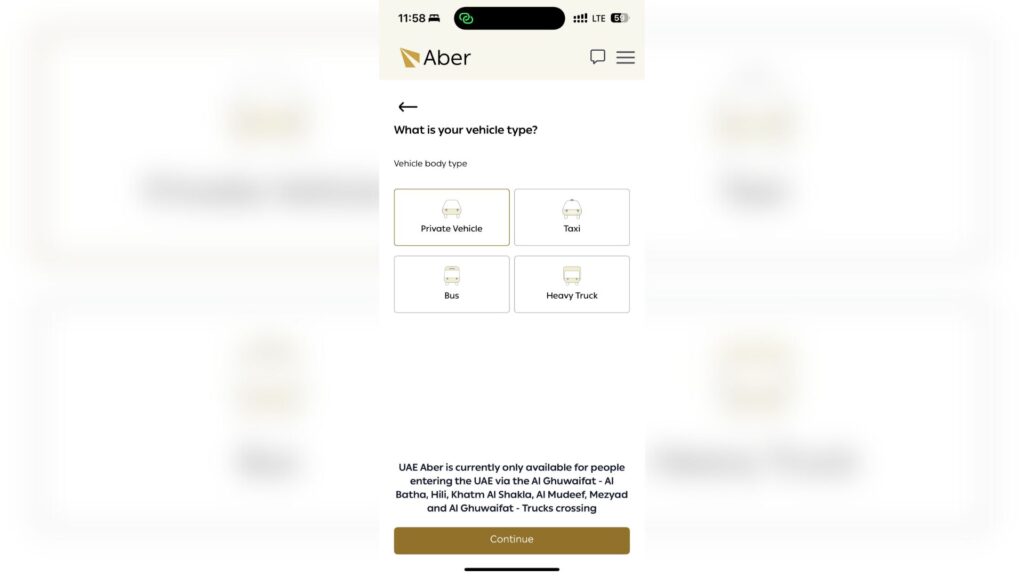
Choosing the type of vehicle
On this screen, the app asks what type of vehicle you’re entering the United Arab Emirates with. You’ll see the following options:
- Private Vehicle
- Taxi
- Bus
- Heavy Truck
In a typical travel scenario – private car, motorcycle on a trip, camper van, and so on – you select “Private Vehicle”. The other options are meant for those actually driving a taxi, bus, or truck—basically, the locals 😃.
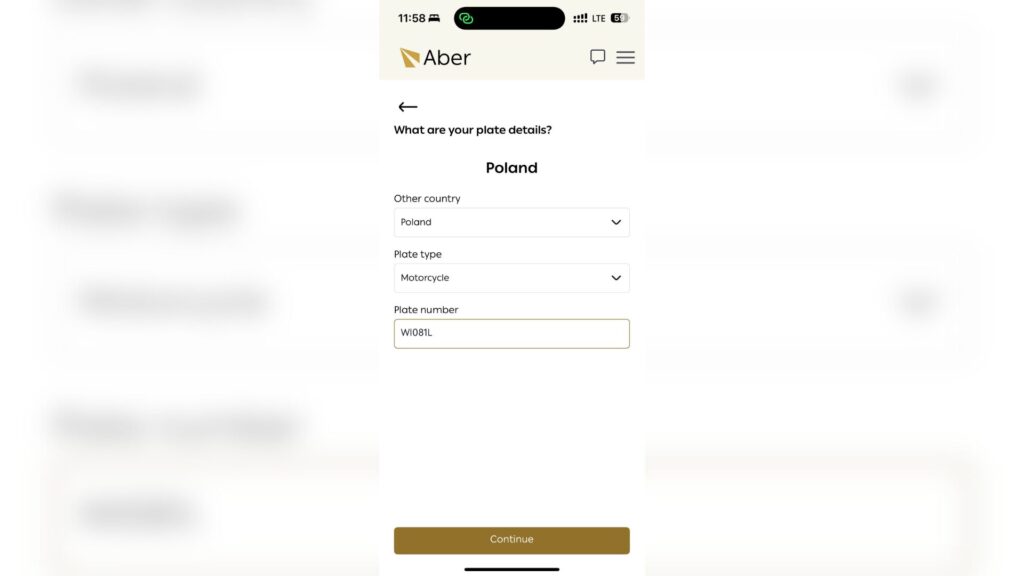
Registration number and country of registration
This step can be a bit confusing at first, because the app shows five “quick” regional countries at the top: 🇸🇦 Saudi Arabia, 🇴🇲 Oman, 🇰🇼 Kuwait, 🇧🇭 Bahrain, and 🇶🇦 Qatar. These are simply shortcuts for travelers entering the UAE from neighboring Gulf states.
If your vehicle is registered outside the GCC – like ours from Poland – you don’t select any of those tiles. Instead, scroll down to “Select plate country below” and choose your registration country from the list, for example Poland.

After clicking Continue, another screen will appear with two fields to fill in:
- Plate type – select the type of vehicle (e.g., Motorcycle),
- Plate number – enter the registration number.
Insurance period
In the next step, you choose how long the policy should be valid and when it should start. The app suggests the most common options – 15 days, 30 days, 3 months, and 6 months – and under “Other” you can usually select a full year as well.
First, decide how long you’ll realistically be staying in the UAE (or in the region overall) and choose the policy duration accordingly. If you’re on a longer journey, keep one more thing in mind: the Carnet de Passage (CPD) issued for your vehicle is typically valid for 12 months. It can be extended, but not with a single click—this usually involves additional fees and paperwork, so it’s worth planning ahead.
Then you set the start date of the insurance:
- 📅 Today – the policy starts today,
- 📅 Another date – you choose a specific day, but no more than 10 days in advance.
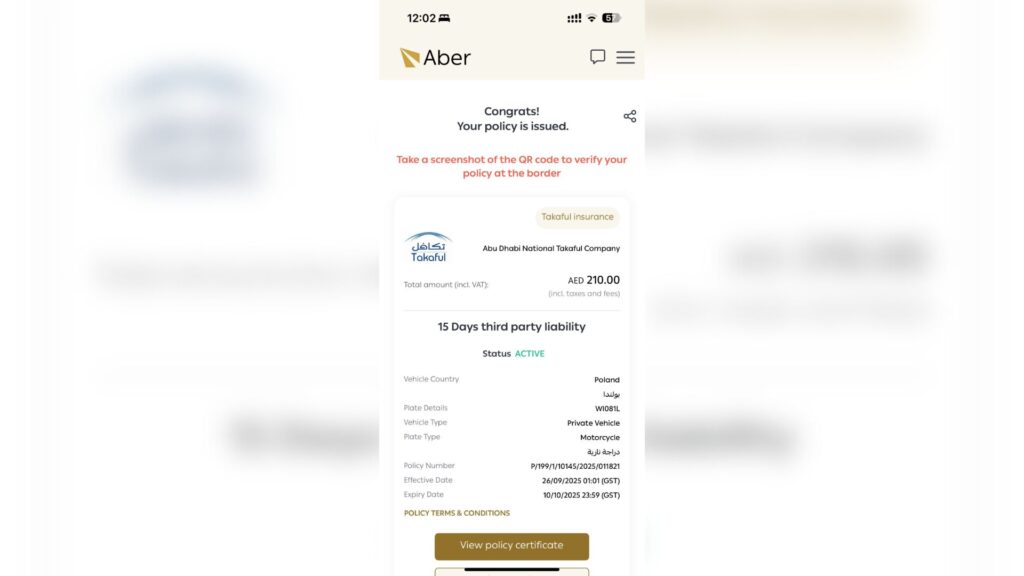
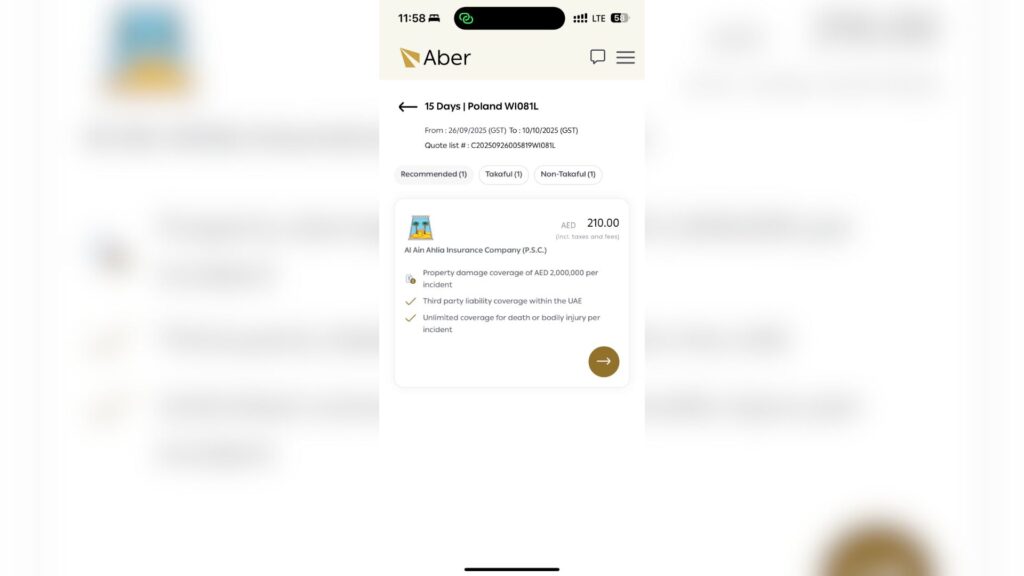
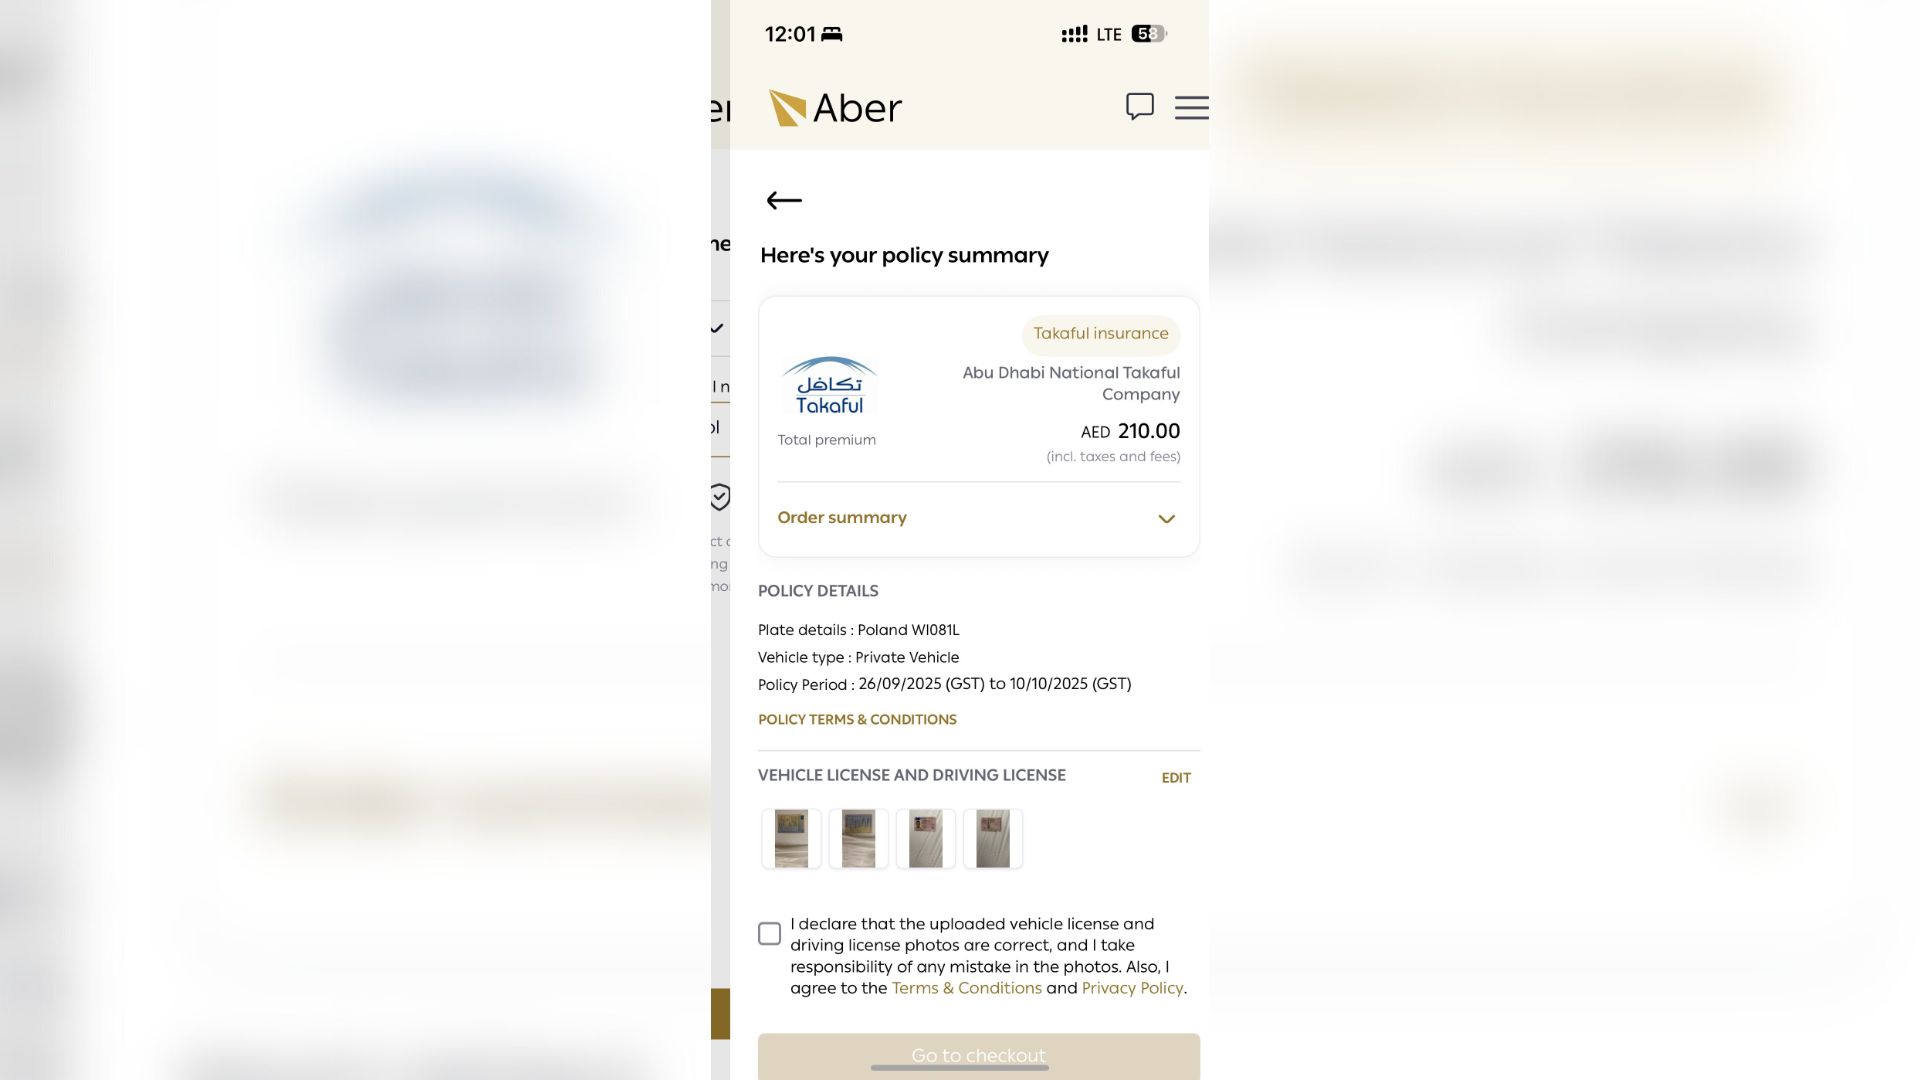
What are the prices like? For us, with a motorcycle registered in Poland, the app showed an approximate price of:
- 15 days: from AED 210 (approx. PLN 205)
- 30 days: from AED 315 (approx. PLN 308)
- 3 months: from AED 420 (approximately PLN 411)
- 6 months: from AED 525 (approximately PLN 513)
Treat this as a real-world example, because prices can vary depending on the insurer and the type of vehicle. Cars are often slightly more expensive to insure than motorcycles due to their higher weight, greater potential damage, and different risk calculations—so don’t be surprised if you see a higher quote.

Choosing an insurer
After entering your vehicle details, the app will show a list of available offers, usually divided into tabs like Recommended, Takaful, and Non-Takaful. It may sound serious, but in practice it comes down to a simple choice: which company you pick and which option suits you best in terms of duration and price.
“Recommended” is simply the app’s suggestion—usually something like “the most sensible choice” according to its algorithm. It doesn’t mean the other offers are worse or that they won’t be accepted at the border.
Takaful vs Non-Takaful — what’s the difference? Simply put: both options provide normal insurance coverage. The difference lies in how they’re structured behind the scenes, not in whether you pay a premium—because you do in both cases.
- Non-Takaful is standard, conventional insurance: you pay a premium to the insurance company, and the company takes on the risk. If a claim occurs, the payout comes directly from the insurer, according to the policy terms.
- Takaful works more like a shared fund: many drivers contribute money to a common pool, which is then used to cover claims made by participants. The company you see in the app acts as the operator of this fund – it manages it and charges a fee for doing so.
What does this mean in practice for a traveler? Honestly – not much. At the border, what matters is that the policy is valid and that you have proof to show. So instead of overthinking the tab names, just pick an offer that works for you and move on 😉.
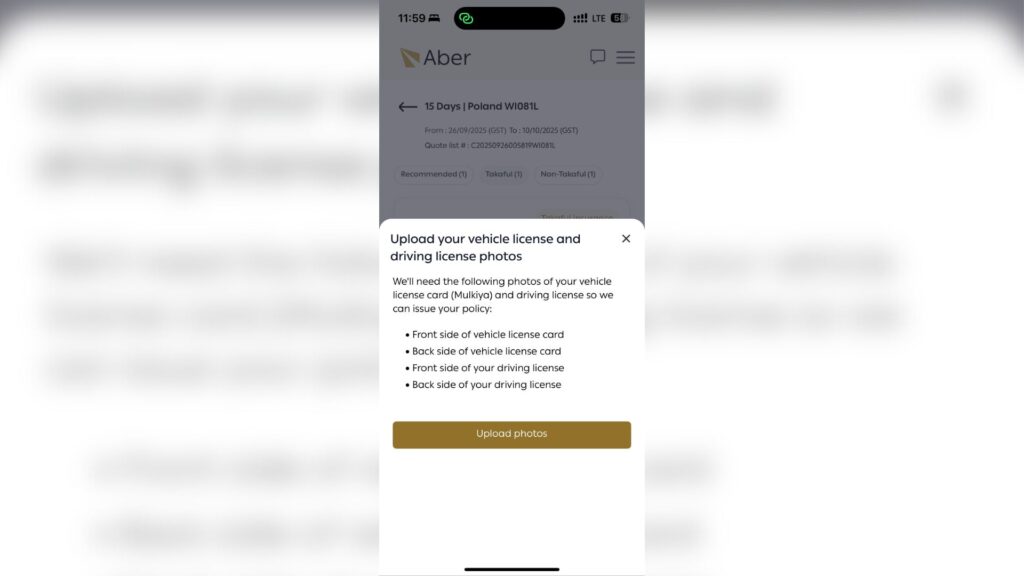
Required photos of the vehicle and documents
At this step, the app will ask you to upload photos – without them, the policy won’t be issued. You’ll see a message like “Upload your vehicle license and driving license photos”, which simply means you need to add photos of your vehicle registration and your driver’s license.
In the app, you may see the word “Mulkiya” next to the license card section—this is the local term used in the region for a vehicle registration document. For a car or motorcycle registered in Poland, you simply upload your standard vehicle registration document.
Payment and finalization
At the end, the app will display a “Policy summary” screen—an overview of what you’re about to purchase. It’s worth spending literally a minute here, because if something is entered incorrectly, it can turn into unnecessary stress at the border later on.
What should you check before making a payment?
- does the country of registration and license plate number match,
- Have you selected the correct type of vehicle (car vs. motorcycle)?
- Are the insurance period and start date correct?
- Are all photos uploaded (thumbnails should be displayed)?
If everything is OK, check the box to confirm that the information is correct and that you accept the terms and conditions, then click Go to checkout.
The payment looks classic
- Apple Pay is most often suggested on iPhones,
- or payment by card (credit/debit card).
When paying by card, you will usually be asked to complete 3D Secure verification (i.e., confirmation in your banking app/code/transaction approval) – approve it and you’re done.
What should you do immediately after purchasing a policy?
After payment, the system generates a policy in the application. And here it is really worth doing three things right away before you close the app:
- take screenshots of the confirmation/policy (to have offline),
- download the documents displayed by the application (PDF),
- Save them on your phone and, ideally, upload them to the cloud or email them to yourself.
You’re unlikely to be looking for a printer while on the road, so your phone becomes your “document folder.” At the final border check, the officer may ask to see proof of insurance—show the policy on your screen and you’re good to go. Safe travels.